
Task Definitions in Oracle APEX: Part I
Discover how to implement Task Definitions in Oracle APEX to manage approval and action tasks in your applications. With Grixxo's guide, learn how to set deadlines, assign responsible users, define parameters, and automate actions efficiently.
13 minutes read
Table of Contents
1. Introduction
2. Create an Application in Your Oracle APEX Workspace
3. Specify the Deadline for Your Task
5. Assign Responsible Users to Complete the Task
6. Add Parameters
7. Task Action Configuration
- 7.1. Send Push Notification
- 7.2. On Event: Specify Events to Trigger Actions
- 7.3. Success Message
- 7.4. Error Handling
- 7.5. Stop Execution On Error
- 7.6. Log Messages When
- 7.7. Server Side Condition
8. Runtime Views for Tasks
9. Conclusion
1. Introduction
The Task Definition feature was introduced in Oracle APEX version 22.1. This feature allows you to define tasks that are initiated by one user and approved or rejected by another. In this guide, you will learn how to create a task and implement it in your applications.
2. Create an Application in Your Oracle APEX Workspace
Before creating a Task Definition, we will first create an application in our Oracle APEX workspace.

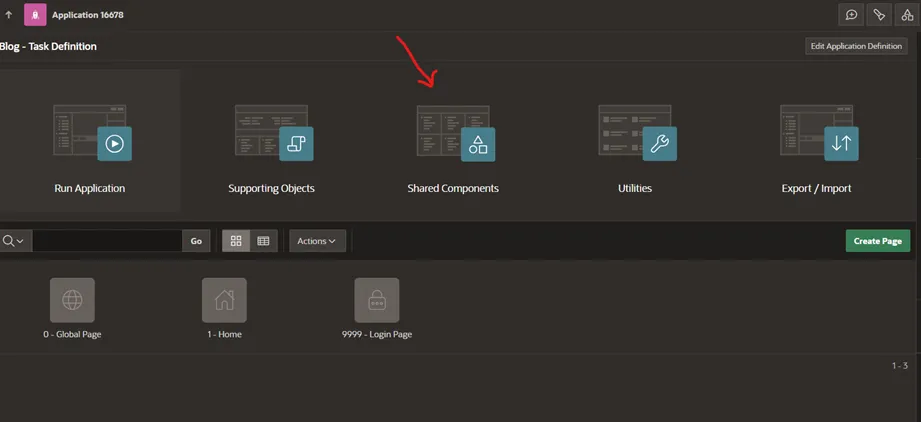
Once the Blog - Task Definition application is created, go to Shared Components to continue the configuration.
Next, access Workflows and Automations and select Task Definitions to create and manage your tasks.

After clicking on Task Definitions, select Create to begin the creation of a new task.

After clicking, the following screen will appear.

To create the task, you must complete the required fields. In this case, the task will be called Blog Task.
Type refers to the type of task. Oracle APEX offers two types: Approval Task and Action Task.
- An Approval Task allows the task to be approved, rejected, or delegated.
- An Action Task requires performing a specific action, such as uploading a file, which marks the task as complete.
Subject defines the topic or description of the task when it is created. For example:
“Increase the salary of employee &EMPLOYEE_NAME from &OLD_SALARY to &NEW_SALARY.”
If a task is created to increase the salary of employee José from $1000 to $2000, the message would be:
“Increase the salary of employee José from $1000 to $2000.”
Priority sets the task priority, where 1 is high priority and 5 is low priority. This helps participants manage their tasks according to importance.
Potential Owner and Business Administrator are roles with different privilege levels:
- Potential Owner: A user or group authorized to claim and complete the task. Once claimed, other Potential Owners will not be able to manage it.
- Business Administrator: A user or group with advanced permissions to manage tasks, even if they are not the owner. They can reassign tasks, change statuses, or intervene to ensure compliance.
It is important to assign at least one user to one of these roles. The Name and Subject fields are mandatory, while Potential Owner and Business Administrator are optional.
Once the Blog Task is created, you’ll be taken to the page where you can set the task deadline, assign participants, define parameters, set the data source, and schedule actions.

On the Name tab, you can modify the task name. In this case, we will keep the original task name and static ID unchanged.
Next, go to the Settings tab to continue configuring the task.

On this tab, the type of task selected during creation is shown. In our case, we selected an Approval Task. It’s important to note that the Type field cannot be modified after the task is created.
The Initiator Can Complete option, if enabled, allows the user who initiated the task to also approve or reject it.
The Subject field can be modified to add additional information that helps Potential Owners or Business Administrators better understand the task. You can also adjust the task’s Priority based on urgency.
Another optional field is Task Details Page Number, which allows you to generate a specific page for the task.
If you’re wondering what &EMPLOYEE_NAME, &OLD_SALARY, or &NEW_SALARY represent, these are dynamic values coming from columns in a SQL query. To use them, you need to select SQL Query or Table as the source. They can also be defined as task parameters.
3. Specify the Deadline for Your Task
In a Task Definition, you can set a due date for the task. By default, the Due On Type field is set to None, meaning the task has no defined time limit. This means the task will remain active indefinitely until approved or rejected.
To ensure timely task management, it is recommended to assign an appropriate deadline based on the task’s priority and workflow.

The Interval option uses the ISO Interval format (according to ISO 8601). An example of this format is PT12H, which means the task will expire after 12 hours. You can also choose other options to define expiration, such as SQL Query, Function Body, Expression, and Scheduler Expression.
Regarding the Expiration Policy, its default value is None, but it can be changed to Expire or Renew. If Expire is selected, the task will enter an expired state once the deadline passes. If Renew is selected, you can configure how many times the task can be renewed before it expires.
5. Assign Responsible Users to Complete the Task
For a task to be effective, it is essential to assign one or more participants who can initiate, claim, approve, or reject the task. Participants can be assigned according to the roles and permissions established in the task, such as Potential Owner or Business Administrator.
- Potential Owner: Users or user groups that can claim and complete the task. Only the Potential Owner who has claimed the task can change its status, so it’s important to assign the right people to avoid confusion.
- Business Administrator: Users with elevated privileges who can manage the task, even if they are not the owners. Business Administrators can reassign tasks, change their status, and ensure the entire process runs smoothly.
When adding participants, be sure to clearly define their roles so each knows what actions they can perform on the task.

Additionally, you can specify which users will be involved in the task flow using the Value Type field. The available options to determine participants are:
- Static: Allows you to assign a static participant, i.e., a specific user, directly in the field. Just enter the participant’s name.
- SQL Query: This option allows you to run a SQL query on a user table to retrieve one or more participants dynamically. You can query a table of users with specific roles or based on certain criteria.
- Function Body: Here, you can call a function that returns a user or group of users. The function must be defined in the database and can be customized to return results based on specific conditions.
- Expression: Allows you to define a logical expression to assign participants. For example, you can configure an expression that assigns a participant if the current user is
USER_TWO.
These Value Type options offer flexibility to dynamically determine which participants can claim, approve, reject, or manage the tasks.
6. Add Parameters
It is possible to add parameters to a task to customize the information used in the Subject or in the actions associated with the task. Parameters provide a flexible mechanism to pass dynamic values that can change depending on the context of each task.
For example, if you want to personalize the Subject message of the task, you can use parameters like &EMPLOYEE_NAME or &SALARY_INCREASE to reflect task-specific values in each instance. This way, each task can display relevant and specific information when it is created or managed.
How are parameters used?
- In the Subject: Parameters can be included in the Subject field to personalize the message, as shown in previous examples where values like the employee’s name or salary were used.
- In Actions: Parameters can also be used in the task actions, either as part of the criteria or in the values passed to business operations.
Define Parameters for the Task
Parameters in Oracle APEX Task Definitions are of type String and must be defined with a unique Static ID so they can be used later in the task’s Subject or associated actions. This Static ID is essential to refer to the parameter consistently across different task contexts.
In addition to defining the Static ID, there are three additional configurations you can specify for each parameter:

- Required: If this option is selected, the parameter must be completed before the task can proceed. In other words, the parameter cannot be left blank.
- Visible: When this option is enabled, the parameter will be visible to users when interacting with the task. This is useful for displaying relevant information to the task participant.
- Updatable: If enabled, the parameter’s value can be modified by users during the task workflow.
With these options, you can control how and when parameters are used within the task, ensuring the required information is correctly collected and accessible for task management.
7. Task Action Configuration
Actions are specific operations executed in response to events that occur during the workflow of a task. These actions allow certain tasks to be automated and the process to be made more efficient. For example, an action might send a notification, update a field, or assign a new task to a user.
Each task can have multiple associated actions, which are executed in a specific order. This order is defined through the Execution Sequence, which determines the order in which actions are carried out when the corresponding event occurs. It is important to organize actions correctly to ensure they execute at the right time and in the desired sequence, as this directly impacts the task’s workflow.
Action: INCREMENT_SALARY
In this case, we’ve created an action called INCREMENT_SALARY. In the Type field, we select the kind of action to be performed. If we choose Execute Code, this allows the execution of PL/SQL code or consumption of a REST service, depending on what’s needed.

In this example, the action uses DML (Data Manipulation Language) code to update the user’s salary. It’s important to note that APEX$TASK_PK refers to the primary key of the task, which is used in the query in the Setting tab, specifically in the Action SQL Query field, where the SQL query that will be executed upon triggering the action is configured.
This type of action allows direct modification of data in the database, making it a powerful tool for automating tasks in Oracle APEX.

Email Notification: Send E-Mail
If we want to send an email notification as part of our task action, we can choose the Send E-Mail option. When selecting this option, additional fields appear where we must enter the necessary information such as the recipient, subject, and message body.
Additionally, we can use Email Templates to make the notification more personalized and professional. These templates allow dynamic information, such as the user’s name or task details, to be included, enabling message customization without manually writing all content.
This approach enhances process automation, allowing the system to send emails to task participants at key moments, such as when the task is created, approved, or completed.

7.1. Send Push Notification
The Send Push Notification option allows notifications to be sent directly to application users instead of by email. This type of notification is particularly useful when we want to alert users about important events in the application, such as task approval.
For example, if a user has requested a salary increase and the task is approved, we can configure a push notification so the user receives a real-time alert about the status change. This notification can be customized with details such as the user’s name, the approved amount, etc., to make it more relevant.
Push notifications are useful for keeping users instantly updated, even when they are not directly interacting with the application, improving the user experience.

7.2. On Event: Specify Events to Trigger Actions
The On Event option allows an action to be executed when a specific task-related event occurs. Depending on the task type and workflow, different events can be selected to trigger the action.

Available event types include:
- Claim: Triggered when a potential owner claims the task, changing its status from Unassigned to Assigned.
- Complete: Executed when the task is completed. For approval tasks, it can be configured to trigger only if the result is Approved or Rejected.
- Delegate: Triggered when the task is delegated to another potential owner.
- Update Comment: Triggered when a comment is added to the task.
- Update Priority: Triggered when the task priority is changed.
- Update Parameter: Triggered when task parameters are updated.
- Release: Triggered when the task is released, changing its status from Assigned to Unassigned.
- Cancel: Triggered when the task is canceled, indicating no further interest in completing it.
- Create: Triggered when the task is created.
- Request Information: Triggered when the task initiator requests additional information.
- Submit Information: Triggered when the requested information is submitted by the initiator.
- Before Expire: Triggered before the task’s due date is reached. Requires specifying an ISO/SQL time interval.
- Expire: Triggered when the task’s expiration date is reached and it expires.
7.3. Success Message
The Success Message is a message displayed when an action executes successfully. This message confirms that the requested operation was completed successfully, providing clarity and assuring the user that the process ran smoothly.
It’s important to customize this message so it’s clear and helpful to the user. For example, if the action is a salary increase, the success message could be: “The salary of &EMPLOYEE_NAME has been successfully updated.”
7.4. Error Handling
The Error Handling tab allows you to specify a message that will be displayed if the action fails. This message is crucial for informing the administrator about the issue that occurred. The message you enter is automatically saved in the Task History, making it easier to track and debug failed tasks.

7.5. Stop Execution On Error
When the Stop Execution On Error option is enabled, task execution will stop immediately if an error occurs. This is useful when you want to ensure that, if a failure occurs during action execution, the system doesn’t continue processing incorrectly. This helps prevent further errors and ensures that the process stops before making unintended changes.
7.6. Log Messages When
The Log Messages When option determines when messages should be logged in the Task History. Four options are available:
- None: No messages are logged in the task history.
- Success: Only success messages are logged.
- Failure: Only error messages are logged, which can be helpful for quickly detecting and fixing problems.
- All: Both success and error messages are logged, providing a complete and detailed history of all task executions.
7.7. Server Side Condition
The Server Side Condition option allows you to add a condition that must be met before the action is executed on the server. Here, you must choose the type of condition you want to apply. This is useful when you only want to perform certain actions if specific criteria are met, such as verifying a variable or the status of an ongoing process.

The words in yellow represent the available condition types. Depending on the selected type, you’ll need to fill out certain fields. If the condition is met, the action will be executed. If not met, the action will not be executed.
When selecting one of the following conditions (highlighted in yellow in the system), you must provide the corresponding values to perform the comparison or validation:
- APP_USER: Refers to the user currently authenticated in the application.
- USER_ONE: A specific value that might refer to a username, role, or some other identifier.
In the image example, if the condition is :APP_USER = 'USER_ONE', it means the action will only be executed if the authenticated user (APP_USER) matches the value defined as USER_ONE. If the condition is not met, the action will not be executed.
Practical Example:
If you want the action to be executed only when the current user is USER_ONE, make sure to configure the condition as follows:
- Condition Type:
APP_USER - Value to Compare:
USER_ONE
If the user performing the task is USER_ONE, the action will be executed; otherwise, it won’t.
8. Runtime Views for Tasks
Learn about the views APEX_TASKS, APEX_TASK_COMMENTS, APEX_TASK_HISTORY, APEX_TASK_PARAMETERS, and APEX_TASK_PARTICIPANTS.
Oracle APEX provides several views that store the configuration of task definitions within an APEX application. These views are intended to access historical information about one or more task definitions, as described below:
| View | Description |
|---|---|
APEX_TASKS | Properties of each task instance. |
APEX_TASK_COMMENTS | All comments entered for each task instance. |
APEX_TASK_HISTORY | Chronological series of operations performed on a task, including user and update date. |
APEX_TASK_PARAMETERS | Parameters defined in a task along with their runtime values in String format. |
APEX_TASK_PARTICIPANTS | List of participants in a task. This list may differ from the original if admins add or remove participants. |
9. Conclusion
In summary, Task Definitions are useful when aiming to manage workflows efficiently—assigning tasks, controlling deadlines and actions, and ensuring accurate tracking of tasks within an automated process.